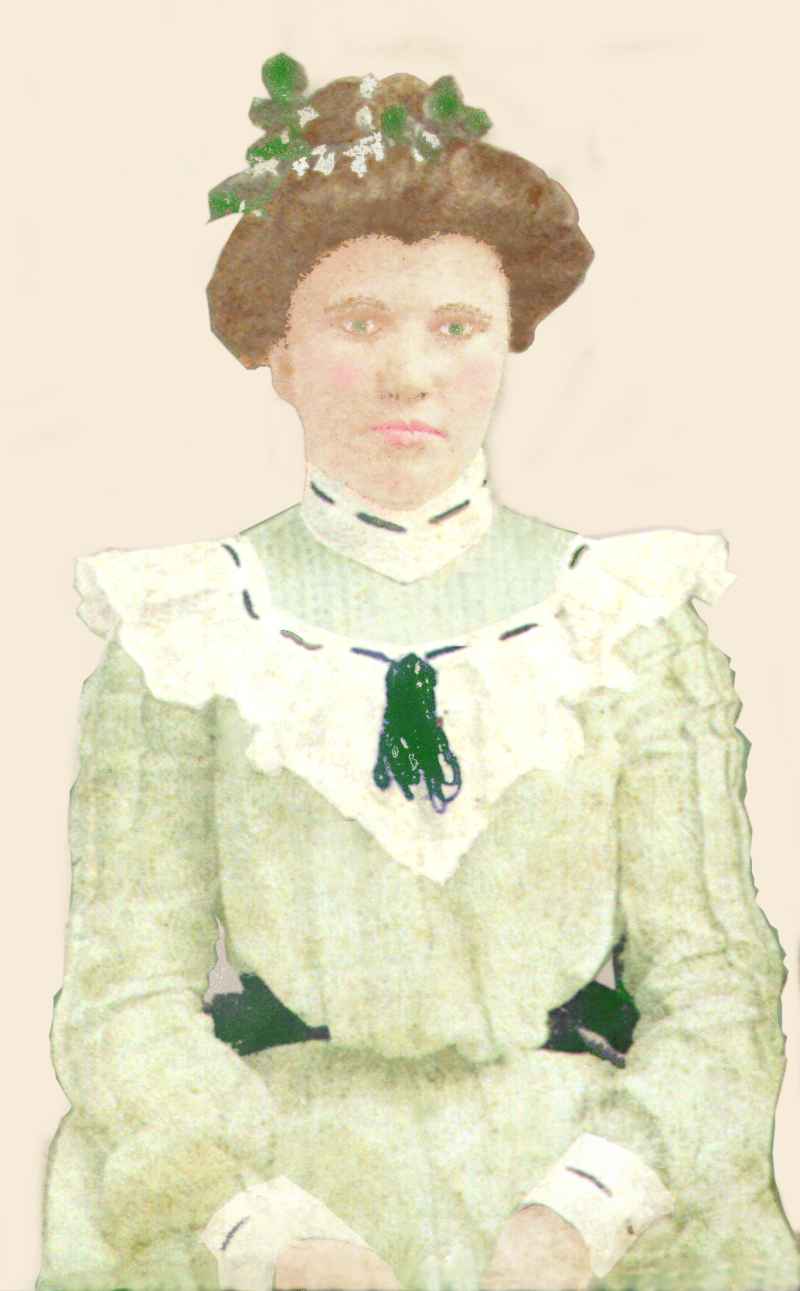
Restoration Challenge #23
How I Did It
1. Effects>Enhance Photo>Auto Saturation Enhancement -Settings: Bias- More Colorful Strength- Normal with Skintones checked
2. Effects> Enhance Photo>Auto contrast Enhancement - Settings: Bias - Darker; Strength - Normal; Appearance- Bold
3. Copy onto Transparent Layer
4. Selected figure of GM - inverted selection - Erased background - filled with Fushia temporarily for contrast
5. Use Clone Brush to get rid of spots
6. Selected Lace Collar and cuffs and lightened.
7. Selected the face and flood filled with flesh tone set very opaque.
8. Used Airbrush to add pale pink to cheeks
9. Selected lips with Lasso tool and flood filled with lip color
10. Using air brush colored the eyes and eyebrows
11. Selected hair with lasso tool and flood filled with brown with opacity set low..
12. With Magic Wand selected white flowers in hair and flood filled with white with opacity set low
13. With Magic Wand selected leaves in hair and air brushed them in. (used air brush instead of flood fill because Magic Wand also selected parts of hair.
14. Using Magic Wand, selected ribbons and flood filled with dark green.
15. Using Lasso tool, selected remaining areas of the dress and flood filled with very opaque green.
16. Went to background layer and floodfilled with beige color.
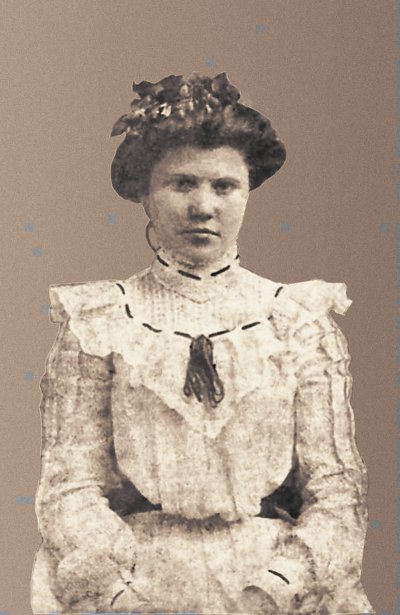
Sepia Toned
Couldn't begin to remember all I did...but I know I used'd Greg's tip on duplicating with blend mode set to multiply, Steve's tip on converting to gray scale and back to 16M colors, tried to take some of the critics advise and put noise in background (some seemed to disappear when I converted to .jpeg) and also liked the gradient background so I tried it. I also liked the sepia tone so I used it also.
